


The Honeywell TH8320R1003 is a programmable touchscreen thermostat designed for efficient home climate control, offering advanced features and user-friendly operation for optimal comfort.
Overview of the TH8320R1003 Model
The Honeywell TH8320R1003, part of the VisionPro 8000 series, is a fully programmable, 7-day thermostat boasting a vibrant touchscreen display. It’s designed for 24V heating and cooling systems, supporting single-stage, multi-stage, and heat pump configurations.
This model offers precise temperature control, customizable scheduling, and remote access capabilities when paired with Honeywell Home connectivity. Installation requires basic electrical knowledge, and the unit is compatible with various HVAC systems, providing energy savings and enhanced comfort.
Key Features and Benefits
The TH8320R1003 offers a user-friendly touchscreen interface for easy programming and control. Key benefits include 7-day programmability, allowing customized schedules for energy savings, and precise temperature accuracy for consistent comfort.
Its compatibility with Honeywell Home provides remote access and control via smartphone. Features like Smart Response technology learn your heating/cooling patterns, optimizing efficiency. The thermostat also supports filter change reminders and displays indoor/outdoor temperatures.

Unboxing and Component Check
Carefully unpack the thermostat, verifying all components are present: the thermostat unit, base plate, screws, wire labels, and this comprehensive installation manual.
Package Contents Verification
Confirm receipt of all listed items to ensure a smooth installation process. Your Honeywell TH8320R1003 package should include the VisionPro 8000 thermostat itself, a mounting base plate for wall attachment, installation screws and anchors, wire labels for easy identification during wiring, and a detailed user/installation manual.
Inspect each component for any visible damage sustained during shipping. If anything is missing or appears damaged, immediately contact Honeywell support for assistance and replacement parts before proceeding with installation.
Identifying Thermostat Components
The TH8320R1003 features a vibrant touchscreen display for intuitive control. Locate the mounting base plate, designed for secure wall attachment, and familiarize yourself with the terminal block where wires connect. Note the System, Fan, and Common (C) wire terminals.
Also identify the jumper settings, often used for compatibility with various HVAC systems. The thermostat’s back panel details component locations; referencing this during wiring is crucial for correct installation and functionality.
Safety Precautions
Always disconnect power to the HVAC system before installation. Incorrect wiring can damage equipment or create hazards; consult a qualified technician if unsure.
Electrical Safety Guidelines
Prior to commencing any wiring, absolutely ensure the HVAC system’s power is switched off at the breaker box. Verify power is off using a non-contact voltage tester. Improper connections can lead to electrical shock or system malfunction.
Never work with wet hands or in damp environments. If wiring appears damaged, do not proceed; contact a qualified HVAC professional. Always adhere to local electrical codes and regulations during installation. Incorrect wiring voids the warranty.
General Installation Warnings
Improper installation can damage the thermostat and your HVAC system, potentially voiding warranties. This thermostat is designed for low-voltage systems (typically 24V). Do not connect to line voltage (120V/240V).
Ensure the thermostat is mounted on a stable surface, away from direct sunlight, drafts, and sources of heat. Carefully follow the wiring diagrams provided; incorrect wiring can cause system malfunction. If unsure, consult a qualified HVAC technician.

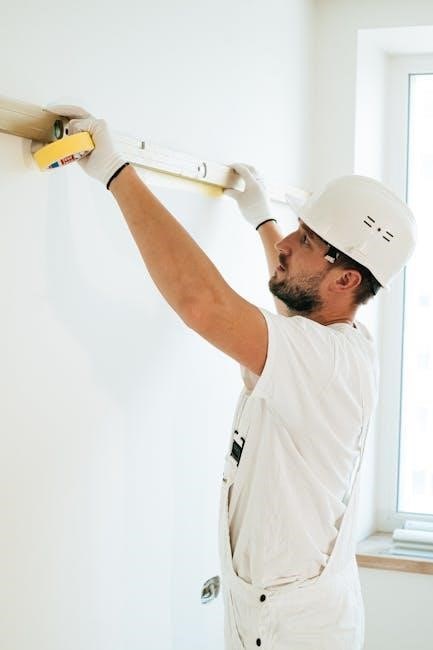
Installation Process
Begin by carefully shutting off power to your HVAC system at the breaker. Then, mount the thermostat baseplate and proceed with the wiring connections.
Turning Off Power to the HVAC System
Before commencing any installation steps, absolutely ensure the power supply to your heating, ventilation, and air conditioning (HVAC) system is completely disconnected. Locate the circuit breaker controlling the HVAC unit within your electrical panel.
Switch the breaker to the “OFF” position. Verify the power is off by attempting to operate the HVAC system using its existing thermostat; it should not respond. This crucial safety precaution prevents electrical shock and potential damage to the thermostat or HVAC components during wiring.
Mounting the Thermostat Base Plate
Carefully remove your old thermostat from the wall, noting the wire connections. Use the included mounting screws and wall anchors to securely attach the Honeywell TH8320R1003 base plate to the wall. Ensure the base plate is level for proper display alignment.
Feed the existing thermostat wires through the opening in the base plate. Confirm a snug fit, but avoid pinching the wires. A level and firmly mounted base plate is essential for correct thermostat operation and a professional appearance.
Wiring the Thermostat
Before connecting wires, double-check the HVAC system’s wiring diagram. Carefully match each wire to the corresponding terminal on the TH8320R1003 base plate. Securely insert each wire into its designated terminal, ensuring a firm connection.
Incorrect wiring can damage your HVAC system. Refer to the wiring diagram and terminal labels for accurate connections. If unsure, consult a qualified HVAC technician before proceeding with the wiring process for safe and proper installation.
Identifying Terminal Connections
The TH8320R1003 base plate features clearly labeled terminals. Common terminals include R (power), C (common), W (heat), Y (cool), G (fan), and others for auxiliary or emergency heat. Consult your specific HVAC system’s wiring diagram to accurately identify each wire’s function.
Proper identification is crucial for correct operation. Misidentified wires can lead to system malfunction or damage. Refer to the thermostat’s wiring diagram and the HVAC system’s documentation for precise terminal assignments before making any connections.
Connecting Wires According to System Type
For conventional systems, connect R, W, Y, and G wires to their corresponding terminals. Heat pump systems require different configurations, often utilizing a reversing valve wire (O/B). Ensure the O/B terminal setting matches your heat pump’s wiring.
Systems with auxiliary heat need an additional wire connected to the AUX or E terminal. Always double-check your HVAC system’s wiring diagram and the thermostat’s configuration settings before finalizing connections to prevent damage.
System Configuration
Proper system configuration is crucial for optimal performance; select the correct heating/cooling type and fan operation settings within the thermostat’s menu.
Setting the System Type (Heat, Cool, Heat/Cool)
Accurately defining your HVAC system type is essential for correct thermostat operation. Access the setup menu, typically by holding the ‘System’ and ‘Fan’ buttons simultaneously. Navigate to ‘System Type’ and select from options like ‘Heat Only’, ‘Cool Only’, or ‘Heat/Cool’.
Choosing the wrong setting can lead to inefficient operation or prevent certain features from functioning correctly. Verify your system’s configuration before proceeding, ensuring the thermostat aligns with your home’s heating and cooling setup for optimal performance and comfort.
Configuring Fan Operation
The TH8320R1003 allows customization of fan operation beyond simple on/off control. Within the setup menu, access ‘Fan’ settings to choose between ‘Auto’ and ‘On’ modes. ‘Auto’ runs the fan only during heating or cooling cycles, while ‘On’ provides continuous air circulation.
Selecting ‘Circulate’ mode enables periodic fan operation for improved air mixing and temperature consistency. Consider your comfort preferences and air quality needs when configuring fan settings for optimal performance and energy efficiency within your home environment.

Programming the Thermostat
The TH8320R1003 enables personalized comfort through programmable schedules, allowing users to set different temperatures for various times and days, optimizing energy use.
Setting Date and Time
Accurate date and time are crucial for proper scheduling. To set these, navigate to the thermostat’s menu using the touchscreen interface. Press and hold the ‘System’ and ‘Fan’ buttons simultaneously to access setup options.
Use the arrow buttons to select ‘Date’ and ‘Time’ and then adjust the values accordingly. Confirm each setting by pressing the ‘OK’ or ‘Select’ button. Proper timekeeping ensures your programmed schedules function as intended, maximizing energy savings and comfort.
Creating a Heating/Cooling Schedule
The TH8320R1003 allows customized heating and cooling schedules for each day of the week. Access the ‘Schedule’ option within the menu. You can create different periods – ‘Wake’, ‘Leave’, ‘Return’, and ‘Sleep’ – assigning specific temperatures for each.
Utilize the touchscreen to set start times and desired temperatures for each period. Copying schedules to multiple days simplifies setup. A well-planned schedule optimizes comfort and minimizes energy consumption based on your lifestyle.
Using Hold Functions
The Honeywell TH8320R1003 offers ‘Hold’ functions for temporary overrides of your programmed schedule. Select ‘Hold’ to maintain a specific temperature indefinitely, or for a defined duration. Options include ‘Permanent Hold’ and ‘Temporary Hold’ with adjustable time limits.
These features are ideal for unexpected schedule changes or when immediate temperature adjustments are needed. Easily cancel the ‘Hold’ to resume the regularly programmed schedule, restoring automated climate control to your home.

Display and Interface Navigation
The TH8320R1003 features a vibrant touchscreen interface, providing intuitive access to settings and schedules, ensuring effortless control of your home’s comfort levels.
Understanding the Touchscreen Interface
The Honeywell TH8320R1003 boasts a responsive color touchscreen, simplifying thermostat operation. Navigation relies on intuitive taps and swipes. The main screen displays current temperature, setpoint, and operating mode.
Accessing menus is done by tapping icons. Holding the ‘System’ and ‘Fan’ buttons simultaneously enters setup mode. Arrow buttons adjust settings, while the ‘Menu’ button provides access to advanced options. The interface is designed for ease of use, even for first-time programmable thermostat owners.
Navigating the Menu System
The TH8320R1003’s menu system is accessed via the ‘Menu’ icon on the touchscreen. Within, you’ll find options for scheduling, system settings, and advanced configurations. Use the up/down arrows to scroll through menu items and the ‘Select’ button to enter a submenu.
To return to the previous screen, tap the ‘Back’ icon. The menu structure is logically organized, allowing users to quickly locate desired settings. Remember to save any changes made before exiting a submenu to ensure proper functionality.
Troubleshooting Common Issues
Common problems include power failures, inaccurate readings, and connectivity issues. Verify wiring, check battery levels, and consult the manual for specific error codes.
Thermostat Not Powering On
If the TH8320R1003 fails to power on, first confirm the HVAC system’s breaker is switched on and supplying power. Next, carefully inspect the thermostat wiring, ensuring all connections are secure and correctly placed according to the installation guide.
Check for a blown fuse within the HVAC system or the thermostat itself (if applicable). If using batteries, replace them with fresh ones. A disconnected ‘C’ wire is a frequent cause; verify its connection. Finally, consult the manual’s troubleshooting section for further assistance.
Incorrect Temperature Readings
If the TH8320R1003 displays inaccurate temperatures, ensure it isn’t directly exposed to sunlight, drafts, or heat-generating appliances. Verify the thermostat is level for accurate sensing. Calibrate the temperature within the settings menu, comparing it to a trusted thermometer.
Check for proper airflow around the thermostat; obstructions can cause false readings. Confirm the correct system type (heat/cool) is configured. If issues persist, a faulty temperature sensor may require professional replacement, as detailed in the manual.
Connectivity Problems (if applicable)
If experiencing Wi-Fi connection issues with the TH8320R1003, first confirm your home network is functioning correctly. Ensure the thermostat is within range of your router and that the correct password was entered during setup. Restart both the thermostat and your router to refresh the connection.
Check for firmware updates via the Honeywell Home app, as these often include connectivity improvements. Refer to the manual for troubleshooting steps related to network security settings and potential interference. Contact Honeywell support if problems continue.

Advanced Settings
The TH8320R1003 offers customizable options like temperature display units (Celsius/Fahrenheit) and filter change reminders, enhancing personalization and system maintenance.
Temperature Display Units (Celsius/Fahrenheit)
The Honeywell TH8320R1003 allows users to select their preferred temperature scale for display. To switch between Celsius and Fahrenheit, simultaneously press and hold the ‘System’ and ‘Fan’ buttons.
Continue holding until the screen enters the setup menu, then use the arrow buttons to navigate to the temperature unit setting. Select your desired unit, and the thermostat will automatically update the display accordingly, providing a comfortable viewing experience tailored to your preference.
Filter Change Reminders
The Honeywell TH8320R1003 features a programmable filter change reminder to maintain optimal HVAC system performance. Access the settings menu through the touchscreen interface and locate the ‘Filter Reminder’ option.
You can customize the reminder frequency based on your filter type and usage. The thermostat will then display a notification when it’s time for a replacement, ensuring clean air and efficient system operation, prolonging the lifespan of your HVAC equipment.
Maintenance and Care
Regular cleaning with a soft cloth ensures optimal display clarity and responsiveness. Avoid harsh chemicals; battery replacement, if needed, is straightforward and easily accessible.
Cleaning the Thermostat
To maintain your Honeywell TH8320R1003’s appearance and functionality, regular cleaning is recommended. Always power off the thermostat before cleaning. Use a soft, dry cloth to gently wipe the touchscreen and the thermostat’s housing.
Avoid using water, cleaning solutions, or abrasive cleaners, as these can damage the display or finish. For stubborn marks, lightly dampen the cloth with water and immediately dry it. Ensure no moisture enters the thermostat’s internal components during cleaning.
Battery Replacement (if applicable)
The Honeywell TH8320R1003 may utilize batteries for backup or primary power, depending on the system wiring. If low battery warnings appear, replace with fresh AA alkaline batteries. Access the battery compartment, typically located on the thermostat’s side or back, by gently opening the designated cover.
Ensure correct polarity when inserting new batteries. Replace all batteries at once for optimal performance. Properly dispose of old batteries according to local regulations. Battery life varies based on usage and settings.
Warranty Information
Honeywell provides a limited warranty covering defects in materials and workmanship for the TH8320R1003. Contact Honeywell support for specific coverage details and claim procedures.
Coverage Details
The Honeywell TH8320R1003 thermostat warranty typically covers defects in materials and workmanship for a specified period from the date of purchase. This generally includes malfunctions under normal use, as outlined in the warranty documentation.
However, the warranty doesn’t cover damage resulting from improper installation, misuse, abuse, accidents, or unauthorized modifications. Proof of purchase is essential for any warranty claim. Refer to the official Honeywell warranty statement for complete terms and conditions, limitations, and exclusions.
Contacting Honeywell Support
For assistance with your TH8320R1003 thermostat, Honeywell offers several support channels. You can visit the official Honeywell Home website for FAQs, troubleshooting guides, and downloadable manuals. Alternatively, you can reach their customer support team via phone during business hours.
Online chat support may also be available through their website. When contacting support, have your model number and date of purchase readily available to expedite the assistance process. Detailed contact information is found on Honeywell’s official website.

Resources and Support
Honeywell’s website provides extensive documentation, including manuals and FAQs for the TH8320R1003. Online forums and community support are also readily accessible.
Honeywell Website and Documentation
Honeywell’s official website is a central hub for TH8320R1003 support, offering downloadable installation guides, user manuals, and troubleshooting resources. These documents detail wiring diagrams, system configuration, and programming instructions.
PDF versions of the manual are available for offline access, ensuring you have information even without an internet connection. The site also features helpful videos demonstrating key installation steps and interface navigation. Explore the Honeywell Home support section for additional assistance and frequently asked questions.
Frequently Asked Questions (FAQ)
Q: Is professional installation required? A: While not mandatory, familiarity with HVAC wiring is recommended. Q: Can I use this with a heat pump? A: Yes, the TH8320R1003 supports various system types, including heat pumps, with proper configuration.
Q: What if my wiring doesn’t match the manual? A: Consult a qualified HVAC technician. Q: How do I reset the thermostat? A: Refer to the manual for specific reset instructions. Honeywell’s support site offers further guidance.