


The Honeywell TH6220U2000 manual provides essential guidance for installing and configuring this programmable thermostat. It ensures proper setup and operation for optimal heating and cooling performance.
Overview of the Honeywell TH6220U2000 Thermostat
The Honeywell TH6220U2000 is a programmable thermostat designed for versatility and compatibility with various HVAC systems. It supports up to 2 stages of heating and cooling, making it suitable for gas, oil, electric, and heat pump systems. This thermostat offers advanced features like programmable scheduling, automatic changeover, and compatibility with smart home systems. Its user-friendly design ensures easy installation and operation, while its robust functionality provides precise temperature control. The TH6220U2000 is ideal for homeowners seeking reliable, efficient, and customizable climate management solutions. Its compatibility with multiple system types ensures it can meet a wide range of heating and cooling needs effectively.
Importance of Following the Installation Manual
Adhering to the Honeywell TH6220U2000 installation manual is crucial for ensuring safe and proper setup. Failure to follow instructions can lead to system damage, safety hazards, or inefficient performance. The manual provides step-by-step guidance tailored to the thermostat’s specifications, minimizing installation errors. Proper installation ensures compatibility with existing HVAC systems, optimal functionality, and energy efficiency. Additionally, following the manual helps maintain warranty validity and prevents potential risks. It also guarantees that all advanced features, such as programmable scheduling and smart home integration, operate as intended. Consulting the manual ensures a smooth installation process and reliable long-term performance of the thermostat.
Key Features of the Honeywell TH6220U2000
The Honeywell TH6220U2000 offers advanced programmable scheduling, supporting up to 2 heat and 2 cool stages. It is compatible with gas, oil, electric, and heat pump systems, providing versatile heating and cooling solutions. The thermostat features an optional cover plate for seamless installation over existing junction boxes. Its user-friendly interface ensures easy navigation and customization. Additionally, it supports integration with smart home systems via the Honeywell Home app, allowing remote monitoring and control. The thermostat also includes advanced settings for optimal performance and energy efficiency, making it a reliable choice for modern HVAC needs.
Pre-Installation Requirements
Assess system compatibility and prepare the site to ensure smooth installation. Verify electrical requirements and compatibility with existing HVAC systems before proceeding.
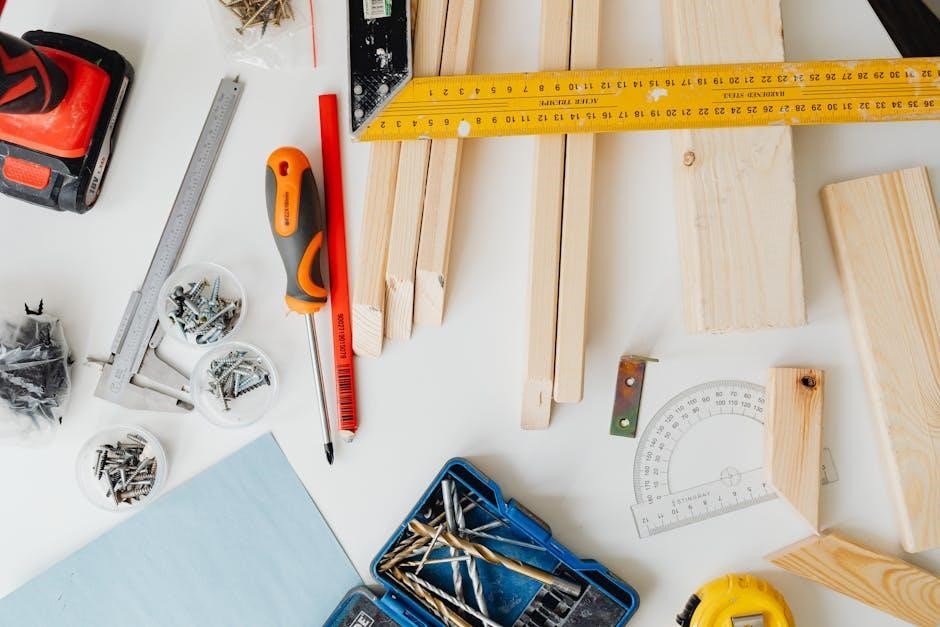
Tools and Materials Needed for Installation
To successfully install the Honeywell TH6220U2000 thermostat, gather the following tools and materials: a drill with bits, screwdrivers (Phillips and flathead), a level, wire strippers, and a pencil. Ensure you have the UWP mounting system, optional cover plate, and any additional hardware for securing the thermostat to the wall. For wiring, check the terminal designations and prepare the necessary cables. Verify compatibility with your HVAC system and ensure all components are included in the package. Refer to the manual for specific wiring requirements and mounting instructions to avoid installation errors. Proper preparation ensures a smooth and efficient setup process.
Understanding System Compatibility
The Honeywell TH6220U2000 thermostat is designed to work with various HVAC systems, including gas, oil, electric, and heat pumps. It supports up to 2 stages of heating and cooling, making it versatile for different setups. Ensure your system matches the thermostat’s specifications to avoid compatibility issues. For heat pumps, verify the correct terminal connections to ensure proper operation. The thermostat’s flexibility allows it to integrate with smart home systems via the Honeywell Home app, enhancing control and efficiency. Always check the manual for specific system requirements to ensure a seamless installation and optimal performance tailored to your home’s needs.

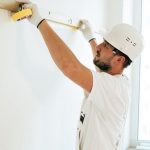
Preparing the Site for Thermostat Installation
Before installing the Honeywell TH6220U2000, ensure the site is properly prepared. Turn off the power to the HVAC system at the circuit breaker. Remove the old thermostat and inspect the existing wiring for damage or corrosion. Clean the wall area where the new thermostat will be mounted to ensure a secure installation. Use the included UWP mounting system to level and mark the wall anchors. If necessary, drill holes for the anchors and insert them firmly. Ensure the area is clear of debris and obstructions. Verify the system is compatible with the thermostat’s specifications before proceeding. Proper site preparation ensures a smooth and efficient installation process.

Installation Process
The installation process involves mounting the UWP system, wiring the thermostat, and connecting it to the HVAC system. Ensure all steps are followed carefully for proper functionality. Optional cover plate installation is also included for a finished look. Always refer to the manual for specific instructions and safety precautions. Proper installation ensures optimal performance and reliability of the Honeywell TH6220U2000 thermostat. Follow the provided guidelines to complete the setup successfully and avoid potential issues. The process is designed to be straightforward for both professionals and DIY enthusiasts. Take your time to ensure each step is executed correctly for long-term efficiency.
Mounting the UWP System
Mounting the UWP (Universal Wall Plate) system is the first step in installing the Honeywell TH6220U2000 thermostat. Begin by opening the package and locating the UWP. Position the UWP on the wall, ensuring it is level, and mark the hole positions according to the manufacturer’s instructions. Drill pilot holes at the marked locations and insert the wall anchors provided. Carefully pull the wires through the wiring hole on the UWP and secure the plate to the wall using the mounting screws. Tighten the screws firmly to ensure stability. Make sure the UWP is flush against the wall for a clean installation. Follow the manual’s guidelines to avoid damaging the system or the wall surface. Proper alignment and leveling are crucial for accurate thermostat operation. If necessary, use the optional cover plate to conceal any gaps or uneven surfaces. This step ensures a secure and professional-looking installation. Always refer to the manual for specific details.
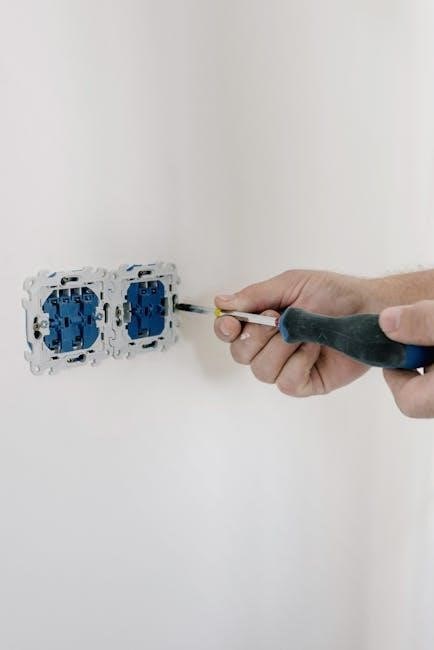
Wiring the Thermostat
Wiring the Honeywell TH6220U2000 thermostat requires careful attention to ensure proper connections. Begin by turning off the power to the HVAC system at the circuit breaker. Locate the wiring terminal designations on the UWP and match them to your system’s wires. For conventional systems, connect the R (24VAC power) to the C (common) terminal. For heat pumps, ensure the O/B terminal is correctly configured. Gently insert each wire into the corresponding terminal, securing them firmly. Avoid over-tightening, which could damage the terminals. Refer to the wiring diagram in the manual for specific configurations, such as 2-stage heating or cooling. After wiring, double-check all connections to prevent malfunctions. If unsure, consult a licensed electrician; Proper wiring ensures safe and efficient operation of the thermostat. Always follow the manufacturer’s guidelines to avoid potential hazards or system damage.
Connecting the Thermostat to the HVAC System
Connecting the Honeywell TH6220U2000 to your HVAC system is crucial for seamless operation. Once the thermostat is wired, ensure all connections align with your system type, such as gas, oil, electric, or heat pump. For heat pumps, the O/B terminal must be set correctly to control the changeover valve. Verify that the system type in the thermostat settings matches your HVAC setup. After wiring, turn the power back on and test the system by running a heating and cooling cycle. This ensures the thermostat communicates effectively with your HVAC equipment. Always refer to the manual for specific system configurations and adjustments to optimize performance and avoid compatibility issues. Proper connection guarantees efficient and safe operation of both the thermostat and HVAC system.
Installing the Optional Cover Plate
The optional cover plate for the Honeywell TH6220U2000 is designed to enhance the thermostat’s appearance and cover any gaps left by previous installations. Begin by ensuring the thermostat is mounted securely on the wall or junction box. Align the cover plate with the thermostat’s base, ensuring proper fitment. Gently snap the cover plate into place until it clicks securely. This accessory does not affect the thermostat’s functionality but provides a sleek, finished look. For detailed steps and visual guides, refer to the installation manual. Always follow the manufacturer’s instructions to ensure the cover plate is installed correctly and evenly.
System Configuration
This section covers configuring the TH6220U2000 for various heating and cooling systems, including 2-stage setups, and adjusting advanced settings for personalized comfort and efficiency.
Setting Up the Thermostat for Heating and Cooling
Setting up the Honeywell TH6220U2000 involves configuring heating and cooling stages. For 1-stage systems, connect the appropriate wires to the R, W, Y, and C terminals. For 2-stage systems, use the R, W1, W2, Y1, Y2, and C terminals. Select the correct system type in the thermostat menu. Ensure the changeover valve is set to either heating or cooling, depending on your system. Refer to the wiring diagram for heat pumps if applicable. Proper setup ensures efficient operation, reducing energy costs and enhancing comfort. Always follow safety guidelines and manufacturer instructions to avoid system damage or hazards. Regularly review settings to optimize performance.
Configuring the System for Heat Pumps
Configuring the Honeywell TH6220U2000 for heat pumps requires setting the correct terminal connections and system parameters. For a 1H/1C heat pump system, connect the R, Rc, Y, O/B, and G terminals. For a 2H/1C system, use the R, Rc, Y, O/B, and G terminals, with auxiliary heat connected to W1 or W2. Ensure the changeover valve is set to “HEAT PUMP” in the thermostat menu. Verify the slider tab on the wiring terminal block is in the correct position for heat pump operation. Refer to the wiring diagram for specific connections. Proper configuration ensures efficient heating and cooling operation. Always follow the manufacturer’s guidelines to avoid system damage or malfunctions.
Programming the Thermostat
Programming the Honeywell TH6220U2000 thermostat allows you to set temperature schedules for optimal comfort and energy savings. Use the touchscreen interface to create up to 4 periods per day, adjusting heat and cool settings as needed. Select from pre-set schedules or customize your own. Enable smart recovery to let the system gradually adjust temperatures before your scheduled times. Additionally, configure temperature limits to prevent extreme settings. For heat pumps, ensure the changeover valve and auxiliary heat settings are properly programmed. Save your settings to maintain consistent operation. Refer to the manual for detailed step-by-step instructions to program your thermostat effectively.
Advanced Settings and Customization
The Honeywell TH6220U2000 offers advanced settings for tailored system operation. Adjust temperature limits, fan operation, and system mode preferences to suit your comfort needs. Explore the menu to customize features like smart recovery, changeover valve settings for heat pumps, and auxiliary heat configuration. These settings ensure efficient energy use and consistent comfort. For added customization, install the optional cover plate to enhance the thermostat’s appearance; Always refer to the manual to navigate these options safely and avoid potential system damage. Proper customization ensures the thermostat operates seamlessly with your HVAC system, providing optimal performance and energy efficiency. Follow the manual for precise guidance.
Wiring and Electrical Connections
Proper wiring is crucial for safe and efficient operation. Follow terminal designations and ensure connections match your HVAC system type, whether conventional or heat pump, to avoid damage;
Understanding Wiring Terminal Designations
Understanding wiring terminal designations is critical for a successful installation. The Honeywell TH6220U2000 uses standardized terminals such as R, Rc, Rh, W, Y, G, C, and O/B for heat pumps. These terminals correspond to specific functions within your HVAC system. For instance, the R terminal connects to the heating system’s power, while Y controls the compressor; Incorrect wiring can lead to system malfunctions or safety hazards. Refer to the manual to ensure each wire is connected to the correct terminal, especially when dealing with heat pumps, which require precise configurations to operate efficiently. Always double-check connections before powering up the system to avoid potential issues.
Wiring for Conventional Systems
Wiring for conventional systems involves connecting the thermostat to your HVAC system’s heating and cooling components. For a standard setup, connect the R (24VAC power) and W (heating) terminals to your heating system. The Y terminal controls the cooling compressor, and G operates the fan. The C terminal provides a common connection for the transformer. Ensure all wires are securely attached to the correct terminals to prevent malfunctions. For systems without a common wire, a jumper may be required between Rc and Rh. Always turn off power before starting and verify connections match your HVAC setup. Incorrect wiring can damage the system or pose safety risks, so refer to the manual for precise instructions and diagrams.
Wiring for Heat Pump Systems
Wiring for heat pump systems with the Honeywell TH6220U2000 requires careful attention to terminal connections. Connect the R (24VAC power) and Rc (cooling) terminals, ensuring the slider switch is set to 2H/1C or 1H/1C, depending on your system. The Y terminal controls the compressor, while the O/B terminal manages the changeover valve. The G terminal operates the fan, and the C terminal provides a common connection. Do not use the W or Aux terminals for heat pump systems, as this can cause damage. Verify all connections match your HVAC setup and refer to the manual for specific wiring diagrams. Proper wiring ensures safe and efficient operation of your heat pump system.
Connecting AC Power to the Thermostat
Connecting AC Power to the Honeywell TH6220U2000 Thermostat
To connect AC power to the Honeywell TH6220U2000 thermostat, ensure the R terminal is connected to the 24VAC power supply from the HVAC transformer. The C terminal connects to the common side of the transformer. If your system requires it, the Rc terminal is used for the cooling stage. Always refer to the wiring diagram in the manual for specific connections. Before starting, turn off the power to the HVAC system at the circuit breaker to ensure safety. After wiring, restore power and test the thermostat to confirm proper operation. If unsure, consult a licensed professional to avoid potential hazards or system malfunctions.

Troubleshooting and Maintenance
Regular maintenance ensures optimal performance. Replace batteries annually, clean the thermostat, and check wiring connections. Resetting to factory settings can resolve malfunctions. Refer to the manual for detailed troubleshooting steps.
Common Installation Issues and Solutions
Common issues during installation include incorrect wiring connections, incompatibility with existing HVAC systems, and improper mounting of the UWP system. Ensure all wires match the terminal designations in the manual. Verify system compatibility before starting. For wiring, double-check the connections to avoid short circuits or faulty operation. If the thermostat doesn’t power on, confirm that the HVAC system’s power is off and the batteries are correctly installed. Mounting issues can be resolved by leveling the UWP and ensuring secure fastening. Refer to the troubleshooting section for detailed solutions and reset the thermostat to factory settings if necessary for a fresh start.
Troubleshooting Thermostat Malfunctions
If the thermostat malfunctions, first check the power supply and ensure batteries are properly installed. Resetting the thermostat to factory settings can resolve many issues. For display problems, verify wiring connections and ensure no loose contacts. If the system doesn’t respond, check HVAC compatibility and wiring configuration, especially for heat pumps. Consult the manual’s troubleshooting section for specific error codes and solutions. Ensure the UWP is securely mounted and level. If issues persist, contact Honeywell support or refer to the detailed troubleshooting guide in the manual for advanced diagnostics and repair steps to restore functionality effectively.
Replacing Batteries and Performing Routine Maintenance
To replace the batteries, turn off the furnace power and remove the thermostat from the wall. Take out the old AA batteries and insert new ones, ensuring correct polarity. For routine maintenance, clean the display and sensors with a soft cloth. Check wiring connections for tightness and inspect the UWP mounting system for stability. Regularly update the thermostat software via the Honeywell Home app. Replace batteries annually or when the low-battery indicator appears. Perform these tasks to maintain optimal performance and extend the thermostat’s lifespan. Refer to the manual for detailed steps and additional maintenance recommendations to ensure proper functionality and efficiency year-round.
Resetting the Thermostat to Factory Settings
To reset the Honeywell TH6220U2000 thermostat to factory settings, navigate to the menu and select “Factory Reset.” This will restore all settings to their default values. After resetting, you will need to reconfigure the thermostat, including heating and cooling schedules, system preferences, and any custom settings. Ensure the thermostat is powered on and not in an active heating or cooling cycle before performing the reset. Note that this process does not delete usage history or previously saved schedules. For detailed instructions, refer to the manual or the Honeywell Home app for guidance. Resetting is useful for troubleshooting or preparing the device for a new installation. Always reboot the system after resetting to ensure proper operation.
System Testing and Verification
After installation, test the HVAC system to ensure proper operation. Verify thermostat functionality and system performance, confirming heating, cooling, and fan modes work correctly for optimal efficiency and comfort;
Testing the HVAC System After Installation
After installing the Honeywell TH6220U2000, test the HVAC system thoroughly to ensure proper functionality. Turn on the power and check heating, cooling, and fan modes. Verify smooth transitions between modes and confirm temperature adjustments respond accurately. Inspect for proper airflow and system performance. Use the thermostat’s diagnostic tools to identify any issues. Ensure all wiring connections are secure and functioning correctly. Perform a full cycle test to validate heating and cooling stages. Check for any unusual noises or malfunctions. If issues arise, refer to the troubleshooting section of the manual. Proper testing ensures reliable and efficient system operation, confirming a successful installation.
Verifying Thermostat Operation
After installation, verify the Honeywell TH6220U2000 thermostat operation by checking basic functionality. Ensure the display is active and responsive to touch inputs. Test heating and cooling modes, adjusting the temperature to confirm the HVAC system responds correctly. Check the fan operation in both auto and manual modes. Verify the thermostat’s ability to switch between heating and cooling based on the set temperature. Review the system’s performance during a full cycle to ensure smooth transitions. Confirm the thermostat’s compatibility with your HVAC system and its ability to maintain the desired temperature. Proper verification ensures the thermostat operates efficiently and meets your heating and cooling needs effectively.
Checking for Proper System Performance
After installation, ensure the Honeywell TH6220U2000 thermostat operates seamlessly with your HVAC system. Check the display for accurate temperature readings and verify setpoint responses. Observe heating and cooling cycles to confirm smooth transitions and consistent operation. Test temperature consistency across your space to eliminate hot or cold spots. Monitor system response times to ensure the thermostat signals the HVAC correctly. Review error messages or alerts for any issues. Proper performance ensures energy efficiency, comfort, and system longevity. If discrepancies arise, consult the troubleshooting section or contact support for assistance. Accurate system performance is critical for optimal functionality and user satisfaction.
Compatibility and Integration
The Honeywell TH6220U2000 is compatible with gas, oil, electric, and heat pump systems. It integrates seamlessly with smart home systems via the Honeywell Home app, offering remote control and programmable scheduling for enhanced comfort and efficiency.
Compatibility with Gas, Oil, and Electric Systems
The Honeywell TH6220U2000 thermostat is designed to work seamlessly with gas, oil, and electric heating systems, as well as heat pumps, ensuring versatile compatibility. It supports up to 2 stages of heating and 2 stages of cooling, making it adaptable to various HVAC configurations. The thermostat’s universal design allows it to integrate with traditional forced-air systems and hydronic heating setups. Its compatibility with multiple power sources ensures reliable performance across different energy systems. This flexibility makes it an ideal choice for homeowners with diverse heating and cooling needs, providing efficient temperature control regardless of the system type.
Integration with Smart Home Systems
The Honeywell TH6220U2000 thermostat seamlessly integrates with smart home systems, enhancing control and convenience. Using the Honeywell Home App, users can remotely monitor and adjust temperatures, receive system notifications, and optimize energy usage. Compatibility with platforms like Z-Wave enables integration into broader smart home networks, allowing for voice control through devices like Amazon Alexa. This advanced connectivity ensures effortless management of heating and cooling systems, providing a modern, efficient, and user-friendly experience. The thermostat’s smart capabilities make it an ideal choice for homeowners seeking to upgrade their HVAC system to a connected, intelligent solution.
Using the Honeywell Home App
The Honeywell Home App offers a user-friendly interface to control the TH6220U2000 thermostat remotely. Through the app, users can adjust temperature settings, schedule HVAC operations, and monitor system performance. Features like geofencing and smart alerts ensure energy efficiency and convenience. The app also provides detailed energy usage reports, helping homeowners optimize their settings for comfort and cost savings. Compatibility with both iOS and Android devices allows seamless integration into daily routines. By following the manual’s setup instructions, users can quickly connect their thermostat to the app, unlocking advanced smart home functionalities and enhancing their overall HVAC experience.
The Honeywell TH6220U2000 manual ensures successful installation and operation. For further assistance, download the PDF or contact Honeywell’s customer support for expert guidance and resources.
Final Checklists for a Successful Installation
Ensure all wiring connections are secure and match the manual’s terminal designations; Verify the thermostat is properly mounted and leveled. Check system compatibility and configuration settings for heating, cooling, or heat pump systems. Confirm the thermostat is programmed correctly for your schedule and preferences. Test the HVAC system to ensure proper operation in all modes. Review the installation manual to confirm all steps were followed accurately. Finally, ensure the thermostat has a stable power supply and perform a full system test to verify functionality. These checks guarantee a safe and efficient installation of your Honeywell TH6220U2000 thermostat.
Downloading the Full Installation Manual PDF
To access the Honeywell TH6220U2000 installation manual, visit the official Honeywell website or trusted platforms like ManualsLib. Search for “Honeywell TH6220U2000 manual” to find the PDF. Download the document for free to get detailed installation instructions, wiring diagrams, and troubleshooting tips. Ensure the manual is compatible with your thermostat model for accurate guidance. This resource is essential for a smooth installation process, covering all aspects from system preparation to final testing. Save the PDF for future reference to maintain and optimize your thermostat’s performance efficiently.
Accessing Honeywell Customer Support
For assistance with the Honeywell TH6220U2000, visit the official Honeywell website or contact Resideo Customer Care toll-free at 1-800-468-1502. Their support team provides guidance on installation, troubleshooting, and maintenance. Additionally, the Honeywell Home App offers advanced features and support resources. Online platforms like ManualsLib also host the manual and user guides. Ensure to refer to the correct model number, TH6220U2000, for accurate support. Honeywell’s comprehensive customer service ensures smooth installation and operation, addressing any issues promptly for optimal thermostat performance.