


Hart 40V 18 Inch Mower Manual: A Comprehensive Guide
This manual thoroughly details the Hart 40V 18-inch mower, offering guidance on assembly, operation, maintenance, and troubleshooting for optimal performance and longevity․
Welcome to the world of cordless convenience! The Hart 40V 18-inch mower represents a powerful and efficient solution for maintaining your lawn․ Designed for homeowners seeking a balance between performance and ease of use, this mower delivers a reliable cutting experience without the constraints of a cord․

This manual serves as your comprehensive guide, providing detailed instructions on everything from initial assembly to long-term maintenance․ Understanding its features and following the outlined procedures will ensure safe and effective operation, maximizing the lifespan of your Hart mower․ Prepare to experience a cleaner, quieter, and more enjoyable lawn care routine!
Safety Precautions & Warnings
Prioritize safety during all phases of operation! Always disconnect the battery before performing any maintenance or adjustments․ Wear appropriate safety glasses and sturdy footwear to protect against debris․ Never operate the mower in wet conditions or near flammable materials․

Keep children and pets away from the mowing area․ Inspect the lawn for obstacles before each use․ Do not attempt to modify the mower in any way․ Familiarize yourself with the emergency stop procedures․ Following these precautions will minimize the risk of injury and ensure a safe mowing experience․
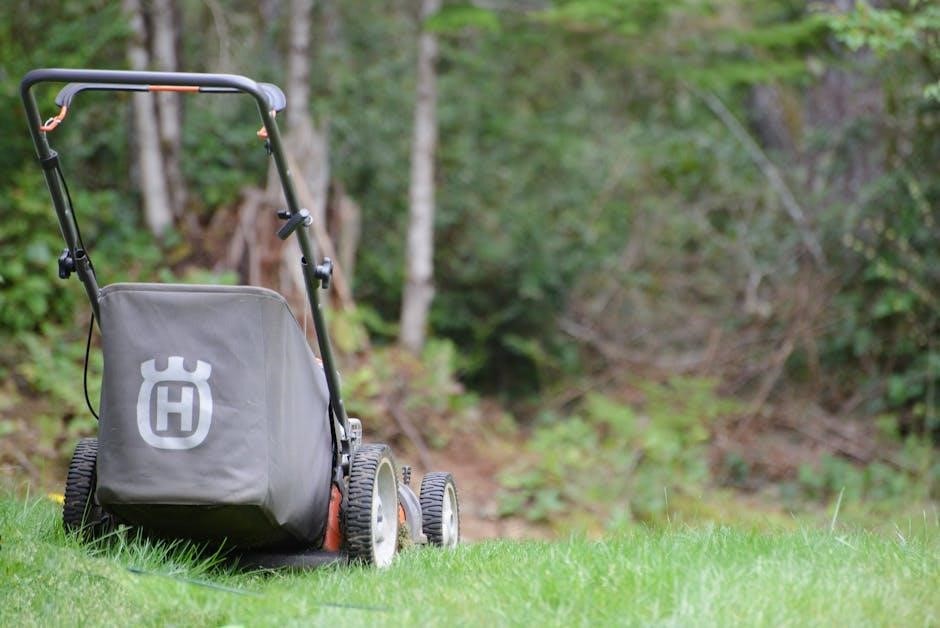
Component Identification

Understanding the mower’s parts is crucial for assembly and maintenance․ Key components include the deck, blade, handle, wheels, battery compartment, and charger port․ The handle features control levers for operation and safety features․ The deck houses the blade and directs airflow for cutting and discharge․
The battery provides power, and the charger replenishes it․ Familiarize yourself with the location and function of each part before beginning assembly or operation․ Refer to the detailed diagrams within this manual for visual assistance in identifying each component accurately․
Blade & Deck Assembly
The blade and deck are fundamental to the mower’s cutting performance․ Ensure the blade is securely fastened with the correct hardware, following the torque specifications outlined in this manual․ Inspect the deck for any damage before each use, addressing any cracks or bends immediately․
Proper blade installation is critical for safety and a clean cut․ Always disconnect the battery before working on the blade․ Regularly check the blade for sharpness and replace it when necessary to maintain optimal cutting efficiency and prevent strain on the motor․

Handle & Controls
The handle assembly provides ergonomic control during operation․ Familiarize yourself with the location of all controls, including the safety key, power button, and any height adjustment levers․ Ensure the handle is securely locked into position before each use, preventing unwanted movement during mowing․
Understand the function of each control to operate the mower safely and efficiently․ Regularly inspect the handle for any signs of damage or looseness, tightening any bolts as needed․ Proper handle adjustment contributes to user comfort and reduces fatigue․

Battery & Charger Details
The Hart 40V mower utilizes a high-capacity lithium-ion battery for extended runtime and consistent power․ The included charger is specifically designed for this battery, ensuring optimal charging speeds and battery health․ Always use the provided charger; using alternatives may damage the battery or create a safety hazard․
Charging times vary depending on the battery’s state of discharge․ Refer to the charger’s indicator lights to monitor the charging progress․ Store the battery in a cool, dry place when not in use, avoiding extreme temperatures․
Assembly Instructions
Before operating your Hart 40V mower, complete assembly is crucial for safe and effective use․ Carefully unpack all components and verify against the parts list․ Begin by attaching the handle to the mower deck, securing it with the provided bolts and washers․ Ensure a firm and stable connection․
Next, install the blade, following the detailed instructions to guarantee proper alignment and tightening․ Finally, install the battery and connect the charger for initial power-up․ Double-check all connections before proceeding․
Attaching the Handle
Securely attaching the handle is the first step in assembling your Hart 40V mower․ Align the handle with the designated mounting points on the mower deck․ Insert the provided bolts through the handle brackets and into the threaded holes of the deck․
Using the appropriate wrench, tighten the bolts firmly, ensuring the handle is stable and doesn’t wobble․ Proper handle attachment is vital for comfortable control and safe operation․ Double-check tightness before each use to prevent accidents․
Installing the Blade
Correct blade installation is crucial for safe and effective mowing․ Always disconnect the battery before working near the blade! Use gloves for protection․ Position the blade onto the spindle, ensuring it’s facing the correct direction – the cutting edges should point towards the discharge chute․
Secure the blade with the blade bolt and washer, tightening it to the manufacturer’s specified torque․ A loose blade is extremely dangerous․ Verify the blade is firmly attached before operation․ Regularly inspect for damage or wear․
Battery Installation & Charging
Proper battery handling ensures optimal performance and longevity․ Slide the 40V battery into the mower’s battery compartment until it clicks securely․ To remove, press the release button and pull the battery out․ Always charge the battery using the provided Hart charger․
Insert the battery into the charger, and plug the charger into a standard outlet․ The charger’s indicator light will show the charging status․ Avoid charging in extreme temperatures․ Store the battery in a cool, dry place when not in use․
Operating Instructions
Before each use, inspect the lawn for obstacles․ Ensure the discharge chute is clear․ To start, insert the safety key and depress the bail handle․ Hold the handle firmly against the mower body․ Release the bail to immediately stop the blade․
Always walk at a comfortable pace behind the mower․ Overlapping each pass slightly will provide a cleaner cut․ Be mindful of uneven terrain and adjust speed accordingly․ Never operate the mower in wet conditions․ Prioritize safety and awareness during operation․
Starting & Stopping the Mower
To initiate operation, firmly insert the safety key․ Simultaneously, depress and hold the bail handle against the mower’s body; this activates the motor․ Ensure a secure grip on the handle throughout use․ Releasing the bail handle instantly halts the blade rotation, a crucial safety feature․
Confirm the area is clear of obstructions before starting․ Never attempt to start the mower with a damaged or missing safety key․ For emergency stops, release the bail immediately․ Always allow the blade to completely stop before approaching․
Adjusting Cutting Height
The Hart 40V mower features multiple cutting height positions, easily adjusted via individual wheel levers․ Locate these levers near each wheel․ To raise the cutting height, move the lever to a higher numbered position․ Conversely, lowering the lever decreases the cutting height․
Ensure all four wheels are set to the same height for an even cut․ Begin with a higher setting for initial use, then lower as needed․ Regularly check the height setting, especially after transporting the mower․
Mulching vs․ Side Discharge

The Hart 40V mower offers both mulching and side discharge options, enhancing its versatility․ Mulching finely chops grass clippings and returns them to the lawn as fertilizer, promoting healthier growth․ To mulch, install the mulching plug (sold separately) into the discharge chute․
Side discharge expels clippings out the side, ideal for longer grass or larger areas․ Remove the mulching plug to enable side discharge․ Consider grass length and desired lawn appearance when selecting a method․
Maintenance & Care
Regular maintenance ensures your Hart 40V mower’s longevity and optimal performance․ After each use, clean the deck thoroughly, removing grass clippings and debris to prevent corrosion․ Sharpen or replace the blade annually, or more frequently if encountering abrasive conditions․
Inspect the battery terminals for corrosion and clean as needed․ Store the battery in a cool, dry place, avoiding extreme temperatures․ Proper care extends the life of your mower and maintains its cutting efficiency, saving you time and effort․
Blade Sharpening & Replacement

A sharp blade is crucial for a clean cut and healthy lawn․ Regularly inspect the blade for dullness or damage․ Sharpening can be done with a file or grinding wheel, ensuring balanced sharpening to prevent vibration․
When the blade is severely damaged or worn, replacement is necessary․ Always disconnect the battery before handling the blade․ Securely fasten the new blade, tightening the bolt to the manufacturer’s specified torque․ Proper blade maintenance significantly improves cutting performance and mower safety․
Deck Cleaning
Maintaining a clean mower deck prevents rust, corrosion, and buildup of grass clippings․ After each use, remove visible debris with a scraper․ Periodically, tilt the mower (with the battery removed!) and thoroughly wash the underside of the deck with a garden hose․
Avoid direct water spray on electrical components․ Allow the deck to dry completely before storage․ Regular cleaning ensures optimal airflow and prevents premature wear, extending the life of your Hart 40V mower․
Battery Maintenance & Storage
Proper battery care maximizes its lifespan and performance․ After each use, clean the battery terminals with a dry cloth․ Store the battery in a cool, dry place, away from direct sunlight and extreme temperatures․
For long-term storage, charge the battery to approximately 50-75% capacity․ Periodically check the charge level and recharge as needed․ Avoid completely discharging the battery, as this can damage it․ Following these guidelines ensures reliable power for your Hart 40V mower․

Troubleshooting Common Issues
Encountering problems? This section offers solutions to frequent issues․ If the mower won’t start, ensure the battery is fully charged and properly connected․ Check the safety key and blade engagement lever․ For an uneven cut, verify the blade is sharp and correctly installed, and adjust the cutting height․
If the battery isn’t charging, inspect the charger and power outlet․ Consult the manual for detailed diagnostics and safety precautions before attempting repairs․
Mower Won’t Start
If your Hart 40V mower fails to start, several factors could be at play․ First, confirm the battery is fully charged and securely inserted into the mower․ Ensure the safety key is properly engaged; it’s a crucial safety feature․ Next, verify the blade engagement lever is in the correct operating position․
Inspect the mower for any obstructions under the deck․ A clogged deck can prevent operation․ If issues persist, consult the full manual for detailed troubleshooting steps and safety guidelines․
Uneven Cut
An uneven cut with your Hart 40V mower often indicates blade issues or improper deck leveling․ Begin by inspecting the blade for dullness, damage, or bending – a sharp blade is essential․ Ensure the deck is clean and free of grass buildup, which can affect airflow․
Verify the cutting height is appropriately adjusted for your lawn conditions․ Uneven terrain can also contribute; consider slower mowing speeds․ If problems continue, consult the manual for detailed deck leveling instructions and blade maintenance procedures․
Battery Not Charging
If your Hart 40V battery isn’t charging, first check the power source and ensure the charger is securely connected to both the battery and a functioning outlet․ Inspect the charger’s indicator light for any error signals – a flashing light often indicates a problem․
Confirm the battery terminals are clean and free of debris․ A faulty charger or a damaged battery may require replacement; consult the warranty information․ Avoid extreme temperatures during charging, as this can hinder performance․
Parts List & Ordering Information
To ensure the longevity of your Hart 40V 18-inch mower, replacement parts are readily available․ A comprehensive parts list, detailing each component with corresponding part numbers, is included in this manual and online at the manufacturer’s website․
For ordering, visit the official Hart Tools website or contact authorized service centers․ When ordering, have the mower’s model number and the specific part number readily available to ensure accuracy․ Always use genuine Hart replacement parts for optimal performance and safety․
Warranty Information
Your Hart 40V 18-inch mower is protected by a manufacturer’s warranty, safeguarding against defects in materials and workmanship․ The standard warranty period is typically five years for the tool itself and a separate, shorter duration for the battery and charger – often three years․
This warranty does not cover damage resulting from misuse, accidents, or unauthorized repairs․ To make a warranty claim, retain your proof of purchase and contact Hart Tools customer support․ Full warranty details are available online․
Technical Specifications
The Hart 40V 18-inch mower boasts several key specifications․ It operates on a 40-volt lithium-ion battery, providing ample power for efficient cutting․ The deck width is 18 inches, ideal for smaller yards․ Cutting height is adjustable, typically ranging from 1․5 to 4 inches, offering versatility․
The mower features a brushless motor for extended runtime and durability․ Its weight is approximately 35 pounds, ensuring maneuverability․ Battery capacity varies, commonly around 2․5Ah or 5․0Ah, impacting run time․
Storage & Winterization
Proper storage is crucial for maintaining your Hart 40V mower․ Before long-term storage, thoroughly clean the deck, removing grass clippings and debris to prevent corrosion․ Disconnect the battery and store it in a cool, dry place, ideally partially charged․ Inspect the blade for damage and sharpen or replace it as needed․
For winterization, consider using a fuel stabilizer if any fuel remains in the system․ Store the mower in a sheltered location, protecting it from the elements․ Cover it to prevent dust accumulation and ensure longevity․