


Pointillism is a painting technique using small dots of color, developed in the late 19th century by Georges Seurat and Paul Signac. It emphasizes optical mixing and color theory, contrasting traditional blending methods. This innovative approach creates vibrant, detailed images from afar, making it a cornerstone of modern art education.
1.1 Definition
Pointillism is a painting technique characterized by applying small, distinct dots of color to a surface. These dots, when viewed from a distance, optically blend to form a cohesive image. Unlike traditional methods of mixing colors on a palette, Pointillism relies on the viewer’s eye to merge the dots into a full range of hues and shades. The term was first coined by art critic Félix Fénéon in 1886 to describe the innovative approach of artists like Georges Seurat and Paul Signac. This method emphasizes precision and scientific color theory, creating a sense of luminosity and detail. In a classroom setting, teachers can introduce Pointillism by explaining its foundational principles and demonstrating how dots of primary colors can create secondary hues, fostering an understanding of optical mixing and its artistic applications.
1.2 Historical Context
Pointillism emerged in the late 19th century, specifically in the mid-1880s, as part of the Post-Impressionist movement. It was pioneered by French artists Georges Seurat and Paul Signac, who sought to break away from traditional painting techniques. The term “Pointillism” was initially used by art critics to mock the method, but it later gained recognition as a revolutionary approach to art. This technique was a direct response to Impressionism, focusing on scientific color theory and precise application of paint. The movement aimed to achieve greater luminosity and detail by applying small, distinct dots of color. Despite initial criticism, Pointillism became a cornerstone of modern art, influencing future movements. Teachers can emphasize its historical significance by highlighting how it challenged conventional norms and paved the way for innovative artistic expression.
1.3 Key Artists
Georges Seurat and Paul Signac are the most prominent figures associated with Pointillism. Seurat, often regarded as the founder, is best known for his iconic work A Sunday Afternoon on the Island of La Grande Jatte, which exemplifies the technique. Signac, a close collaborator, further developed the method and applied it to vibrant landscapes and seascapes. Other notable artists influenced by Pointillism include Henri-Edmond Cross and Maximilien Luce, who contributed to its evolution. These artists explored the scientific application of color and light, creating works that showcased the optical effects of the technique. Their contributions not only defined Pointillism but also paved the way for future art movements. Teachers can use their works as examples to illustrate the technique’s potential and historical significance in the classroom.
Explaining the Pointillism Technique
Pointillism involves creating images using small, distinct dots of color applied in patterns. The technique relies on optical mixing, where the viewer’s eye blends the dots into a cohesive image. It emphasizes primary colors and scientific color theory, contrasting with traditional painting methods that mix colors on a palette. This method requires patience and precision, as each dot contributes to the overall composition and visual effect. Teachers can demonstrate the technique using simple tools like Q-tips or small brushes, allowing students to experiment with color and light. The process illustrates how individual elements can create a unified whole, making it a valuable teaching tool for understanding color theory and artistic technique.
2.1 Basic Principles
Pointillism is rooted in applying small, distinct dots of color to a surface, allowing the viewer’s eye to blend them into a unified image. This technique contrasts with traditional methods of mixing colors on a palette. Artists use primary colors arranged in patterns to create secondary hues and shades. The dots vary in size, spacing, and color intensity to achieve depth, texture, and light effects. Optical mixing is central, as the eye perceives the collective impact of the dots rather than individual marks. The process demands precision and patience, with each dot contributing to the overall composition. Teachers can introduce this by demonstrating how primary colors, when applied in specific patterns, create a range of tones and shades. This foundational approach helps students grasp the scientific basis of color theory and its application in art.
2.2 Color Theory
Pointillism relies heavily on color theory, particularly the concept of optical mixing. By applying small dots of primary colors—red, yellow, and blue—in specific patterns, artists create secondary colors like orange, green, and purple. The viewer’s eye blends these dots to perceive a wide range of hues and shades. This technique contrasts with traditional color mixing, where pigments are blended on a palette. Teachers can explain how the arrangement and spacing of dots influence color intensity and brightness. For example, densely packed dots of primary colors can create vibrant secondary hues, while spaced dots produce softer, lighter tones. This method allows for dynamic contrast and luminosity, emphasizing the scientific principles behind color perception. Understanding these principles is crucial for students to effectively apply Pointillism in their artwork.
2.3 Tools and Materials
For teaching Pointillism, essential tools include small, precise applicators like Q-tips, toothpicks, or fine brushes to create dots. Students can use acrylic or tempera paints, which dry quickly and adhere well to surfaces. Canvas, heavy paper, or primed boards are ideal for the base. Easels or flat work surfaces are necessary for comfort. Optional materials include magnifying glasses to observe details and color wheels for understanding optical mixing. Teachers should emphasize using readily available, cost-effective supplies to ensure accessibility. Encourage students to experiment with tools to achieve varying dot sizes and textures. Proper preparation of materials, such as priming surfaces or mixing paint, ensures smooth execution. These tools and materials are fundamental for students to grasp the technique and create effective Pointillist artworks.
Structuring the Lesson Plan
A well-structured lesson plan ensures clarity and engagement. It begins with clear objectives, followed by a logical sequence of activities, including demonstrations, hands-on practice, and assessment.
3.1 Objectives
The primary objective is to introduce students to Pointillism’s principles and techniques, enabling them to create their own artworks. Students will understand color theory.
3.2 Target Audience
This lesson plan is designed for students in grades K-12, with a focus on art classes. It is adaptable for younger students, introducing basic concepts, and for older students, exploring advanced techniques. The structured activities cater to diverse skill levels, ensuring inclusivity. Teachers, particularly art educators, will find the curriculum aligned with National Core Arts Standards, emphasizing creativity and technical skills. Additionally, homeschooling parents can utilize this plan for comprehensive art instruction. The resources are ideal for educators seeking engaging, cost-effective methods to teach Pointillism, ensuring students gain hands-on experience with optical mixing and color theory. This approach fosters artistic development and appreciation, making it suitable for both novice and experienced learners. The clear objectives and materials list make it accessible for teachers of all experience levels.
3.3 Duration
The lesson plan is structured to accommodate varying class lengths, ensuring flexibility for educators. For younger students, the activity is divided into four 40-minute sessions, allowing gradual progression from theory to practice. High school classes can complete the unit in a single 60-minute session, focusing on key concepts and hands-on application. The duration is designed to align with standard school schedules, making it easy to integrate into existing curricula. Teachers can adjust the timeline based on student engagement and complexity of projects. For younger grades, shorter, focused sessions are recommended to maintain attention and effectiveness. The structured timeframe ensures comprehensive coverage of Pointillism techniques, history, and application, providing students with a well-rounded learning experience. This flexibility makes the lesson plan adaptable for diverse educational settings and student needs.
Step-by-Step Guide to Teaching Pointillism
This section provides a structured, step-by-step approach to teaching Pointillism, including introduction, demonstration, hands-on practice, and conclusion phases, ensuring comprehensive understanding and application of the technique.
The introduction phase begins with a brief overview of Pointillism, showcasing works by Seurat and Signac. Teachers should display images of famous Pointillist paintings, such as Seurat’s A Sunday on La Grande Jatte, to spark curiosity. Explaining the historical context and key principles, such as the use of small dots and optical mixing, is essential. This phase also includes a discussion of how Pointillism differs from traditional painting methods, emphasizing its scientific approach to color and light. Teachers should ask students if they’ve heard of Pointillism or optical illusions to assess prior knowledge. This engaging start sets the foundation for hands-on learning, encouraging students to explore the technique’s unique visual effects and creative possibilities.
4.2 Demonstration
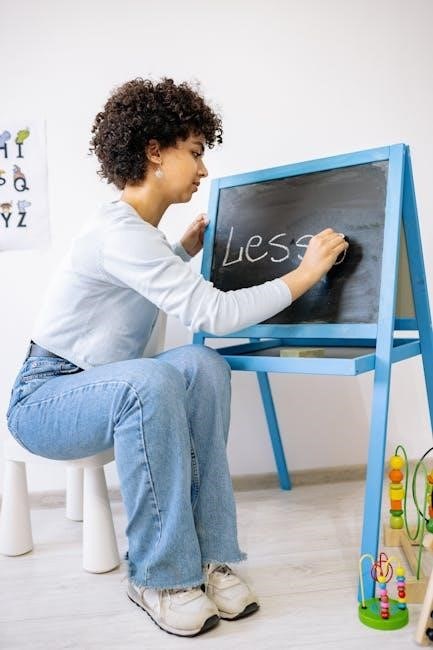
The demonstration phase involves the teacher showcasing the Pointillism technique step-by-step. Using Q-tips or small brushes, the teacher creates a simple Pointillist painting on a large canvas or chart paper. This live example helps students visualize how dots of color blend to form an image. The teacher explains the process of applying dots in patterns, starting with outlines and gradually filling in areas with primary colors. Emphasizing the importance of spacing and layering, the teacher demonstrates how optical mixing creates the illusion of secondary colors. Students are encouraged to observe how the dots appear to merge when viewed from a distance, illustrating the scientific principles behind Pointillism. This hands-on demonstration provides a clear guide for students to follow during their own practice.
4.3 Hands-On Practice
During hands-on practice, students apply the Pointillism technique using Q-tips, paper, and paint. The teacher distributes materials and guides students in creating their own artworks. Students begin by sketching a simple outline, then fill it with dots of primary colors, layering them to achieve secondary hues. The teacher circulates to assist, offering tips on spacing and blending. This phase allows students to experiment and observe how dots merge optically. Encouraging creativity, the teacher emphasizes patience and precision. As students work, the classroom buzzes with engagement, fostering a deeper understanding of Pointillism through direct experience. This practical session lasts 20-30 minutes, ensuring ample time for exploration before transitioning to the conclusion phase.
4.4 Conclusion
The conclusion phase wraps up the lesson by reinforcing learning and celebrating student creativity. The teacher guides students in reflecting on their understanding of Pointillism, discussing challenges and successes. Students share their artworks, receiving constructive feedback and admiration from peers. The teacher highlights key takeaways, such as optical mixing and color theory. A brief discussion on Pointillism’s historical significance and its modern applications enriches the lesson’s closure. The session ends with a Q&A, ensuring all questions are addressed. Students then clean their workspaces and take their artworks home, proud of their creations. This phase lasts about 10 minutes, leaving students with a lasting appreciation for Pointillism and its artistic impact.
Optical Effects in Pointillism
Pointillism creates optical effects through tiny dots of color, blending visually to form vibrant images. This technique relies on distance and perspective to achieve its distinctive, shimmering impact.
5.1 Understanding Optical Mixing
Optical mixing is the core principle of pointillism, where colors blend visually rather than physically. By placing small dots side by side, the viewer’s eye mixes the hues, creating a vibrant and dynamic effect. This technique challenges traditional methods of mixing paints on a palette, instead relying on perception and distance. Teachers can illustrate this by having students observe how primary colors, when applied in dots, appear to mix into secondary colors from afar. This concept not only enhances color intensity but also creates a sense of movement and light in the artwork, making it a fascinating topic for exploration in the classroom;
5.2 Distance and Perspective
Distance and perspective play a crucial role in pointillism, as the technique relies on the viewer’s eye to blend the dots into a cohesive image. When viewed up close, the individual dots are visible, but from a distance, they merge to form shapes, colors, and textures. This optical effect is heightened when the artwork is large, allowing the viewer to step back and experience the full impact. Perspective is also key, as artists like Seurat used dots of varying sizes and densities to create depth and dimension. By guiding students to experiment with viewing distances and layered perspectives, teachers can help them understand how pointillism transforms abstract dots into a lifelike scene, emphasizing the importance of spatial relationships in art.
5.3 Practical Exercises
Practical exercises are essential for students to grasp the fundamentals of pointillism. Begin with simple activities, such as creating basic shapes or patterns using dots. Students can practice applying dots of varying sizes and colors on paper to observe how they blend optically. For advanced learners, assign projects that involve recreating a small section of a famous pointillist painting, like Seurat’s A Sunday Afternoon on the Island of La Grande Jatte. Encourage experimentation with different tools, such as Q-tips or fine brushes, to achieve texture and depth. Additionally, have students work in pairs to create collaborative pieces, fostering teamwork and creativity. These exercises help students understand how pointillism transforms individual dots into cohesive, detailed compositions, bridging the gap between theory and application in a fun, engaging way.
Examples and Case Studies
Famous works like Seurat’s A Sunday Afternoon on the Island of La Grande Jatte and Signac’s Portrait of Félix Fénéon exemplify pointillism. Students can analyze these and create similar pieces, fostering understanding and technique mastery.
6.1 Famous Works
Georges Seurat’s A Sunday Afternoon on the Island of La Grande Jatte is the most iconic example of pointillism, showcasing thousands of dots that blend optically. Paul Signac’s Portrait of Félix Fénéon and Opus 217 also highlight the technique’s vibrancy. These works demonstrate how pointillism creates detailed, luminous images from small dots. Teachers can use these pieces to illustrate optical mixing and color theory principles. Analyzing these masterpieces helps students understand the patience and precision required in pointillism. By studying these works, learners can gain inspiration and a deeper appreciation for the movement’s innovative approach to art.
6.2 Student Examples
Student examples of pointillism showcase their understanding of the technique and its principles. Many young artists create vibrant landscapes or portraits using Q-tips or small brushes to apply dots of color. These works often reflect their interpretation of Seurat’s and Signac’s styles, demonstrating optical mixing and color theory. For instance, students might recreate simplified versions of famous pointillist paintings or develop original compositions inspired by the technique. Their projects highlight creativity and attention to detail, providing a tangible representation of their learning. These examples serve as a portfolio of their progress, allowing teachers to assess their grasp of the method and its artistic potential. Student examples also inspire peers, fostering a collaborative and motivational learning environment focused on artistic exploration and skill development.
Assessment and Feedback
Assessment evaluates students’ understanding of pointillism techniques and their ability to apply optical mixing. Feedback provides constructive guidance, highlighting strengths and areas for improvement in their artistic process and final work.
7.1 Evaluation Criteria
Evaluation criteria for pointillism projects include understanding of the technique, accurate use of color theory, and ability to create optical mixing. Students are assessed on their ability to apply small, precise dots to form cohesive images; Creativity and originality in composition are also considered. Attention to detail, such as maintaining consistent spacing and contrast, is evaluated. The final work’s visual impact and ability to convey the intended image from a distance are key factors. Additionally, adherence to the lesson’s objectives and demonstration of technical proficiency are reviewed. These criteria ensure a comprehensive assessment of both artistic skill and conceptual understanding, providing clear guidelines for constructive feedback.
7.2 Providing Constructive Feedback
Providing constructive feedback is essential for helping students refine their pointillism techniques. Teachers should start by acknowledging the student’s effort and highlighting strengths, such as successful use of color or composition. Specific, actionable suggestions should be offered, such as improving dot spacing or enhancing contrast. Feedback should focus on technical aspects, like adherence to the pointillism method, and creative elements, such as originality. Encouraging students to reflect on their own work and identify areas for improvement fosters a deeper understanding of the technique. Teachers should also relate feedback to the evaluation criteria, ensuring alignment with lesson objectives. Positive reinforcement and clear guidance empower students to grow artistically and master the complexities of pointillism.
Additional Resources and Cross-Curricular Connections
Explore recommended books like “Ways of Pointillism” and websites such as Ducksters and Sotheby’s for deeper insights. Utilize online platforms like Teachers Pay Teachers for lesson plans and creative activities.
8.1 Recommended Reading
For a deeper understanding of Pointillism, recommend Ways of Pointillism: Seurat, Signac, Van Gogh (ISBN-10: 3777426342). This book provides insights into the techniques and histories of key artists. Additionally, online resources like Ducksters’ Art History and Artists ‒ Pointillism offer engaging summaries for students. Sotheby’s and WideWalls feature inspiring articles on Pointillism’s impact and notable works. For lesson planning, explore Teachers Pay Teachers, a marketplace offering original educational resources, including detailed lesson plans and activities. These materials cater to various grade levels, ensuring comprehensive coverage of the topic for both teachers and students.
8.2 Online Resources
Utilize online platforms for comprehensive Pointillism resources. Sotheby’s and WideWalls offer insightful articles on the movement’s history and key artists. Ducksters provides engaging art history summaries, ideal for students. Teachers Pay Teachers features a wide range of lesson plans, worksheets, and videos, reviewed by educators. These resources cater to diverse learning needs, enhancing both teaching and student engagement. They are accessible, affordable, and designed to enrich classroom experiences with practical and inspiring content.