


Sculpey Oven Bake Clay is a popular polymer clay that hardens in a home oven at 275°F (135°C). It’s known for its versatility and ease of use, making it perfect for crafting jewelry, ornaments, and decorative items. This oven-bake clay is a favorite among crafters due to its soft texture and ability to create detailed designs. Whether you’re a beginner or an experienced artist, Sculpey clay offers endless creative possibilities for various projects.
What is Sculpey Oven Bake Clay?
Sculpey Oven Bake Clay is a type of polymer clay designed to be molded, shaped, and hardened in a home oven. It is a popular crafting material known for its pliable texture and versatility. Unlike air-dry clays, Sculpey clay requires baking at a specific temperature to cure, creating a durable, long-lasting finish. It is available in a wide range of colors and can be mixed to create custom hues. This clay is ideal for making jewelry, ornaments, figurines, and decorative items. Its ease of use and ability to retain intricate details make it a favorite among crafters of all skill levels. Once baked, Sculpey clay becomes rigid and can be sanded, painted, or sealed for added durability and aesthetic appeal.
Popularity and Versatility of Sculpey Clay
Sculpey Oven Bake Clay has gained immense popularity among crafters due to its ease of use and versatility. It is widely used for creating intricate jewelry, ornaments, miniatures, and decorative items. The clay’s soft texture makes it easy to shape and mold, while its ability to retain fine details appeals to both beginners and experienced artists. Available in various colors, Sculpey clay allows for endless creativity, as it can be mixed to create custom hues. Its versatility extends to different crafting techniques, such as layering, blending, and combining with other materials. This polymer clay is also a favorite for DIY projects, making it a staple in many crafting communities. Its popularity stems from its adaptability and the professional-looking results it produces after baking.
Basic Tools and Materials Needed
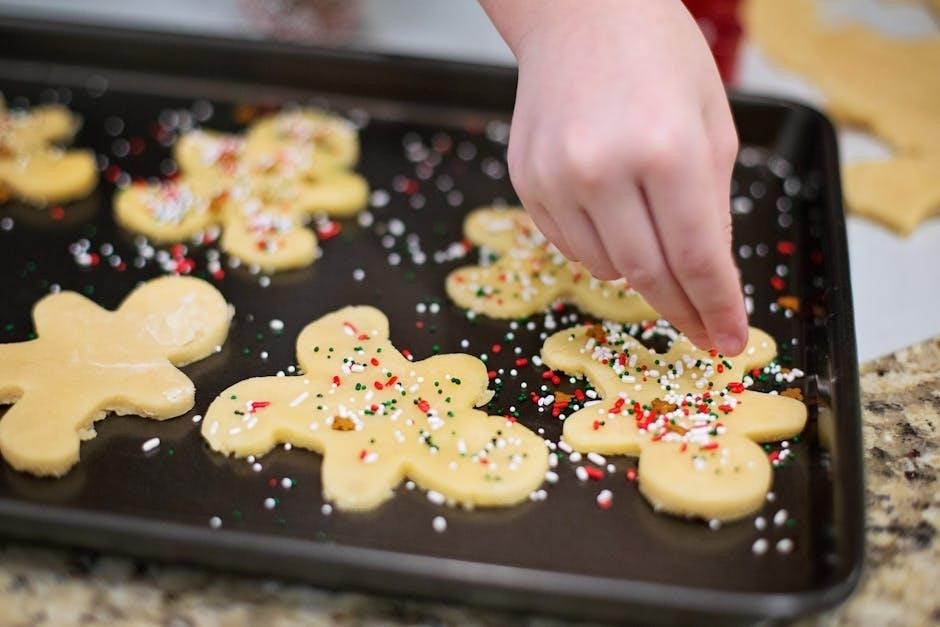
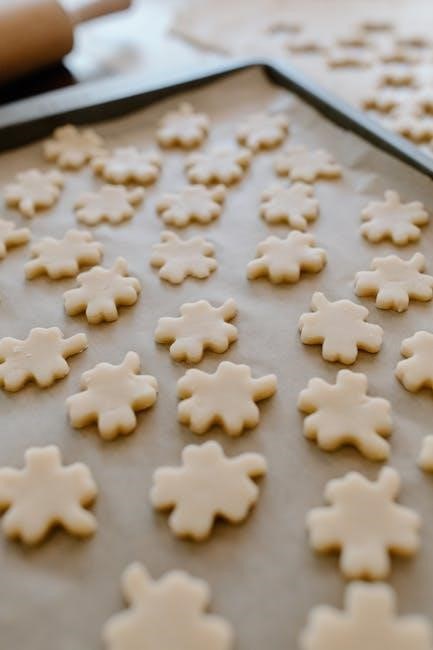
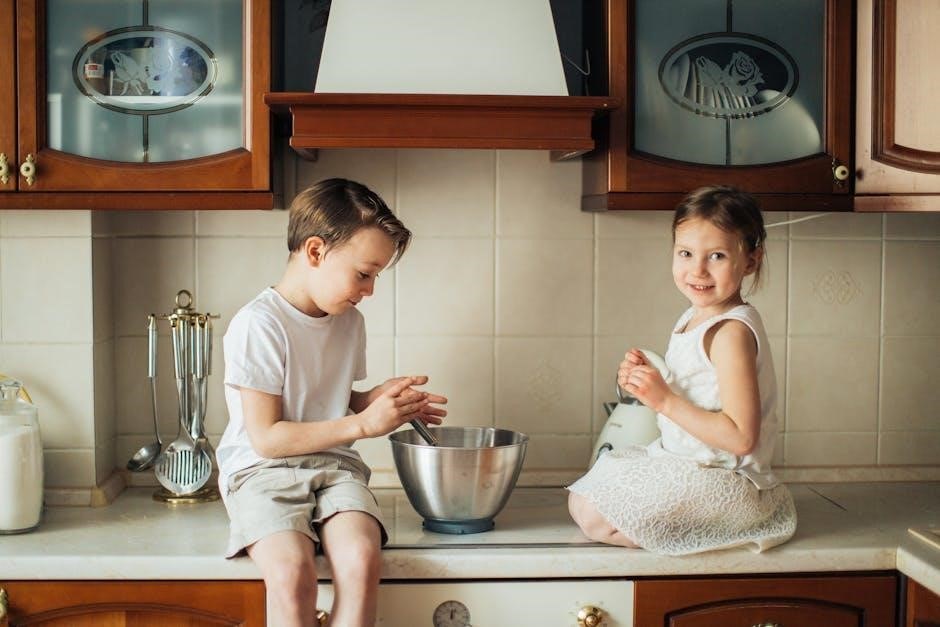
Working with Sculpey Oven Bake Clay requires minimal tools, making it accessible for crafters of all levels. Essential tools include a clean work surface, parchment or wax paper to prevent sticking, and basic shaping tools like rolling pins and clay cutters. A home oven is necessary for baking, and an oven thermometer ensures accurate temperature control. Additional tools like texture mats, molds, and toothpicks can enhance detail and design. While not required, a pasta machine can help achieve uniform thickness. Always have a flat surface and securing tape for parchment paper to keep it in place. These tools and materials provide everything needed to create and bake Sculpey projects effectively.
Preparation Steps for Baking Sculpey Clay
Preheating the oven to 275°F (135°C) is essential. Cover your work surface with parchment or wax paper to prevent sticking. Knead the clay for smooth consistency and even thickness to ensure proper baking results and avoid cracks.
Understanding Clay Thickness and Its Importance
Clay thickness plays a crucial role in achieving even baking and preventing cracks or burns. Thicker pieces require longer baking times, while thinner ones may burn if overcooked. Ideal thickness ranges between 1/4 inch to 1/2 inch for most projects. Uneven thickness can lead to undercooked or overcooked areas, causing structural weakness. To ensure proper curing, measure your project’s thickness with a ruler and adjust baking time accordingly. For pieces exceeding 1/2 inch, consider baking in increments or using a lower temperature for a longer duration. Consistent thickness guarantees a professional finish and durability. Always refer to package instructions for specific guidelines, as different Sculpey products may vary slightly in recommended thickness and baking times.
Preheating the Oven: Recommended Temperature
Preheating your oven to the correct temperature is essential for properly baking Sculpey Oven Bake Clay. The recommended temperature for most Sculpey products is 275°F (135°C). It’s crucial to use an oven thermometer to ensure accuracy, as home ovens can vary in temperature. Place the thermometer in the center of the oven to get an accurate reading. Allow the oven to preheat for at least 10-15 minutes before baking to ensure even heat distribution. Never exceed the recommended temperature, as this can cause the clay to burn or release irritating fumes. Always refer to the packaging instructions for specific temperature guidelines, as some Sculpey products may have slight variations. Proper preheating ensures your clay bakes evenly and cures correctly, avoiding undercooked or overcooked areas.
Preparing the Work Surface: Parchment Paper and Wax Paper
Protecting your work surface is crucial when working with Sculpey Oven Bake Clay, as it can be sticky and leave residue. Cover your workspace with parchment paper or wax paper to prevent the clay from adhering to surfaces like tables or countertops. Secure the paper with tape to keep it in place while you work. This setup not only makes cleanup easier but also ensures your clay pieces don’t stick and are easier to handle. For added convenience, some crafters prefer using ceramic tiles or glass sheets, which can double as both a work and baking surface. If clay accidentally sticks to a surface, rubbing alcohol can help dissolve and remove it. Properly preparing your workspace helps create a smooth and efficient crafting experience.
Kneading the Clay for Optimal Consistency
Kneading Sculpey Oven Bake Clay is essential to achieve the right texture and consistency for your project. Start by breaking off the desired amount of clay and knead it on a clean, dry surface until it becomes pliable and easy to work with. This process removes any air pockets and ensures the clay is evenly soft. If the clay feels too hard or crumbly, let it sit at room temperature for a few minutes to soften. To check readiness, press the clay gently; it should leave a slight imprint but not stick to your fingers. Overworking the clay can lead to it becoming too soft or sticky. If this happens, let it cool slightly before continuing. Proper kneading ensures your clay is ready for shaping and baking, helping you achieve professional-looking results.
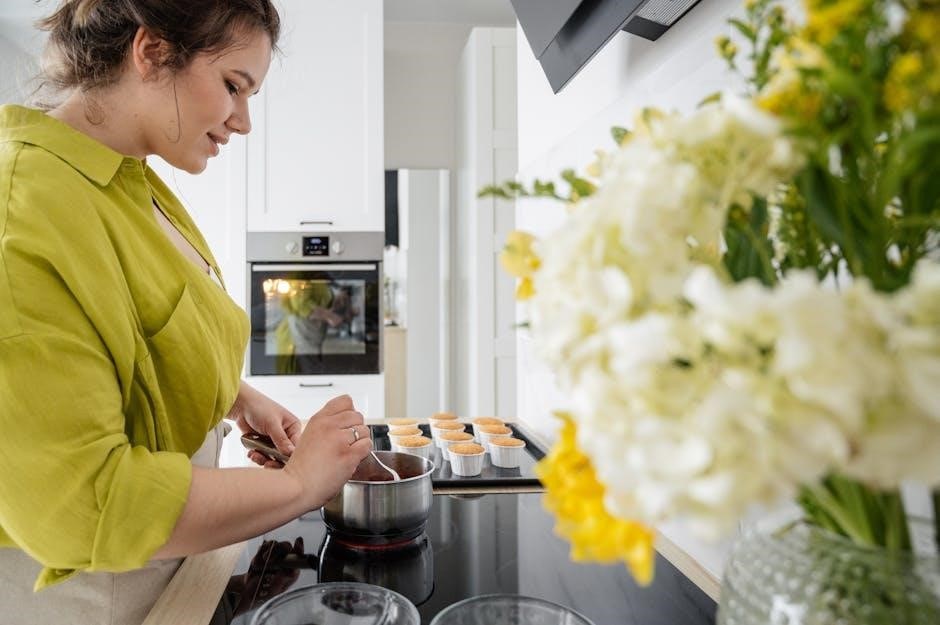
Baking Instructions for Sculpey Clay
Preheat your oven to 275°F (135°C) for Sculpey Clay. Bake for 15-30 minutes per 1/4 inch of thickness. Use an oven thermometer for accuracy and avoid overheating to prevent burning.
Recommended Baking Temperature: 275°F (135°C)
The optimal temperature for baking Sculpey Oven Bake Clay is 275°F (135°C). This ensures the clay cures properly without burning. Always use an oven thermometer to verify accuracy, as incorrect temperatures can lead to uneven results or damage. The clay typically bakes for 15-30 minutes, depending on thickness, with thicker pieces requiring longer times. To prevent overheating, avoid exceeding the recommended temperature. Properly baked clay will harden and become durable, ready for finishing touches like sanding or painting. Ensure even heating by placing pieces on parchment paper and avoiding overcrowding. Follow package instructions for specific clay types, as some may vary slightly. This consistent temperature ensures reliable results for all Sculpey projects.
Baking Time: Guidelines for Different Thicknesses
Baking time for Sculpey Oven Bake Clay depends on the thickness of your piece. A general rule is 15 minutes per 1/4 inch of thickness. For example, a piece 1/4 inch thick bakes for 15 minutes, while a 1/2 inch thick piece requires 30 minutes. Always check the package for specific instructions, as some types of Sculpey clay may have slightly different recommendations. Use an oven thermometer to ensure accurate temperature. If baking multiple pieces, arrange them evenly on parchment paper to prevent overcrowding. Thicker pieces may need longer baking times, while thinner pieces cure faster. Avoid underbaking, as this can result in soft spots. Proper curing ensures the clay hardens completely, making it durable for finishing touches like painting or sealing. Always let the clay cool before handling to ensure it has fully set.
Setting Up the Oven: Using an Oven Thermometer
Accurate temperature control is crucial when baking Sculpey Oven Bake Clay, and an oven thermometer ensures your oven is at the correct temperature. Place the thermometer in the center of the oven rack where your clay will be baked to monitor the heat. Preheat your oven to 275°F (135°C), the recommended temperature for most Sculpey clays, and allow it to stabilize before placing your pieces inside. Using a thermometer prevents overheating, which can burn the clay and release harmful fumes. It also ensures the clay cures properly, avoiding undercooked or soft spots. Always check the packaging for specific temperature requirements, as some Sculpey products may vary slightly. Proper oven setup with a thermometer guarantees consistent results and helps achieve a perfectly baked finish every time.
Baking Multiple Pieces: Tips for Even Heating
When baking multiple pieces of Sculpey Oven Bake Clay, ensure even heating by spacing pieces out on parchment paper-lined baking sheets. Avoid overcrowding, as this can lead to uneven curing. Place smaller pieces on the outer edges and larger ones toward the center for consistent heat distribution. Use an oven thermometer to confirm the temperature remains steady at 275°F (135°C). For uniform baking, rotate the baking sheet halfway through the recommended time. If using multiple racks, stagger them to allow air to circulate freely. This prevents hot spots and ensures all pieces bake evenly. Proper spacing and rotation help prevent undercooked or overcooked areas, ensuring a professional finish. Always follow package instructions for specific baking times based on thickness and quantity of pieces.
Common Issues and Solutions
Common issues with Sculpey Oven Bake Clay include burning, uneven baking, and stuck clay. Solutions involve adjusting oven temperature, ensuring even heating, and using parchment paper to prevent sticking.
Preventing Clay from Burning
To prevent Sculpey Oven Bake Clay from burning, ensure your oven is preheated to the recommended temperature of 275°F (135°C). Use an oven thermometer to verify accuracy, as incorrect temperatures can lead to burning. Place the clay on parchment or wax paper to avoid sticking and promote even heating. Avoid overcrowding the baking sheet, as this can cause uneven heat distribution. Never exceed the recommended baking temperature, as this can cause the clay to burn and release irritating fumes. Keep an eye on the clay during the baking process, especially for thinner pieces, which may cure faster. If unsure, start with shorter baking times and check the clay periodically to ensure it doesn’t overcook. Proper monitoring and adherence to guidelines will help achieve perfectly baked, intact pieces every time.
Dealing with Uneven Baking: Causes and Fixes
Uneven baking in Sculpey Oven Bake Clay can occur due to inconsistent oven temperature, overcrowding, or varying clay thickness. To address this, ensure your oven is preheated accurately using a thermometer and avoid placing too many pieces close together. If some areas bake faster than others, rotate the baking sheet halfway through the recommended time. For thinner pieces, consider covering them with foil to prevent overcooking. Always bake pieces of similar thickness together to maintain even curing. If uneven baking occurs, allow the clay to cool, then sand or trim uneven areas before re-baking. Proper preparation and monitoring can help achieve uniform results. By following these tips, you can minimize uneven baking and ensure your creations turn out perfectly cured and consistent.
Removing Stuck Clay from Surfaces
Removing stuck Sculpey Oven Bake Clay from surfaces can be challenging but manageable. If clay adheres to a surface, avoid using harsh chemicals or abrasive cleaners, as they may damage the material. Instead, gently scrape the area with a plastic scraper or an old credit card to loosen the clay. For stubborn pieces, apply rubbing alcohol to dissolve the clay, then wipe it away with a soft cloth. Avoid using sharp tools, as they may scratch the surface. If the clay has already baked and is stuck, sanding the area carefully can help remove it without damaging the surrounding material. Always test a small area first to ensure the removal method doesn’t harm the surface. Regularly cleaning your workspace with parchment or wax paper can prevent clay from sticking in the future.
Post-Baking Finishing Touches
After baking, Sculpey clay can be sanded for a smooth finish, painted for color, and sealed for protection. Additional coats or details can be added for a polished look.
Sanding the Clay for a Smooth Finish
Sanding your baked Sculpey clay is essential for achieving a smooth, professional finish. Start with a medium-grit sandpaper (120-200 grit) to gently remove any imperfections or bumps. Use a fine-grit sandpaper (400-600 grit) for the final touches to ensure a polished surface. Always sand in one direction to avoid scratching the clay. For intricate details, use a small, fine-grit sanding block or a sanding sponge. Sanding underwater or with a damp cloth helps reduce dust and prevents clogging the sandpaper. After sanding, wipe the piece with a soft cloth or alcohol to remove any residue; Proper sanding not only enhances the appearance of your project but also prepares the surface for painting or sealing. This step is crucial for creating a high-quality, long-lasting finish for your Sculpey creations.
Painting and Sealing the Baked Clay
After baking and sanding your Sculpey clay, painting and sealing are the final steps to enhance its appearance and durability. Use high-quality acrylic paints to add color and detail to your design. Allow each coat to dry completely before applying additional layers. For a polished look, apply a thin, even coat of varnish or sealant specifically designed for polymer clay. This protects the paint and gives a glossy or matte finish, depending on your preference. Avoid using water-based products until the sealant is fully cured. Properly sealing your baked clay ensures it remains vibrant and resistant to wear. This step is especially important for pieces that will be handled frequently or exposed to the environment.
Adding Additional Coats or Details
After baking and finishing your Sculpey clay, you can add additional coats or details to enhance your design. This is a great way to incorporate layers or refine intricate elements. Unbaked clay can be applied to the baked piece and then baked again for a seamless finish. Techniques like sgraffito (scratching designs into the surface) or using stencils can also add texture and complexity. For intricate details, products like Liquid Sculpey can be brushed onto specific areas and baked for a durable, glossy finish. Multiple baking cycles are possible, allowing you to build up layers of color and detail without damaging the underlying clay. This step is perfect for creating dimensional and visually striking pieces. Always ensure each layer is fully cured before adding more to maintain structural integrity and avoid peeling or cracking.
Storage and Maintenance
Store leftover Sculpey clay in an airtight container or plastic wrap to maintain pliability. Keep tools clean and dry, storing them in a cool, dry place to ensure longevity and performance.
Proper Storage of Leftover Clay
Properly storing leftover Sculpey Oven Bake Clay is essential to maintain its quality and usability. After working with the clay, ensure it is wrapped tightly in plastic wrap or placed in an airtight container. This prevents the clay from drying out or absorbing moisture, which can affect its texture. Store the wrapped clay in a cool, dry place away from direct sunlight and heat sources. Avoid refrigerating or freezing the clay, as this can cause it to become brittle or develop condensation. If you have multiple colors, keep them separate to prevent unintended color transfer. Clean and dry your tools before storing them to prevent residue buildup. Following these steps ensures your Sculpey clay remains fresh and ready for future projects.
Keeping Tools Clean and Ready for Reuse
Properly cleaning and maintaining your tools is crucial for working with Sculpey Oven Bake Clay. After use, wash tools with mild soap and warm water to remove any clay residue. For stubborn clay bits, soak the tools in warm water or use a gentle scrubber. Avoid using harsh chemicals, as they may damage certain materials. Once clean, dry tools thoroughly with a soft cloth to prevent rust or corrosion. Store tools in a dry, organized space to ensure they remain in good condition. Regular cleaning prevents clay from hardening on tools, making them easier to use in future projects. This maintenance routine extends the life of your tools and ensures they perform well for every crafting session.
Safety Tips and Precautions
Always work in a well-ventilated area to avoid inhaling fumes. Avoid overheating the clay, as it can release irritating vapors. Keep clay and tools out of reach of children and pets to ensure a safe crafting environment.
Working in a Well-Ventilated Area
Working in a well-ventilated area is essential when using Sculpey Oven Bake Clay to minimize exposure to fumes. While the clay itself is non-toxic, it can release irritating vapors when baked. Open windows or use a fan to ensure good airflow. Avoid inhaling fumes directly, especially for those with sensitivities. Proper ventilation helps create a safer and more comfortable crafting environment. Always prioritize air circulation, even if you’re working on a small project. This precaution ensures a healthier workspace and prevents potential discomfort from inhaling fumes.
Avoiding Overheating and Toxic Fumes
Avoiding overheating is crucial when working with Sculpey Oven Bake Clay to prevent the release of toxic fumes. Polymer clay, when burned, can emit irritating vapors that may cause discomfort or health issues. Always follow the recommended temperature of 275°F (135°C) and use an oven thermometer to ensure accuracy. Overheating can lead to a burnt smell and potentially hazardous fumes. Never exceed the temperature specified on the packaging, as this can damage the clay and release harmful chemicals. Proper ventilation is also essential to prevent the accumulation of fumes in your workspace. By adhering to the guidelines and monitoring the baking process, you can safely create your projects without exposing yourself or others to unnecessary risks. This ensures a safe and enjoyable crafting experience with Sculpey clay.
Keeping Clay Away from Children and Pets
It is essential to keep Sculpey Oven Bake Clay out of reach of children and pets to ensure their safety and avoid potential risks. While the clay is non-toxic, it can pose a choking hazard if ingested in small pieces. Additionally, pets may mistakenly consume the clay, which can cause digestive issues. Always store leftover clay in a secure, airtight container and keep it in a place where children and pets cannot access it. Work on your projects in a dedicated space where you can supervise the materials closely. This precaution helps prevent accidental ingestion and ensures a safe crafting environment; By taking these steps, you can protect both your loved ones and your creative supplies; Remember, even though Sculpey clay is non-toxic, it is not intended for consumption and should be handled responsibly.
Troubleshooting Common Problems
Common issues with Sculpey Oven Bake Clay include uneven baking, undercooked or overcooked pieces, and adhesion problems. These can often be resolved by adjusting oven temperature or baking time. Always refer to the specific instructions for your clay type to ensure proper results and avoid common pitfalls during the baking process.
Why Clay Might Not Cure Properly
Sculpey Oven Bake Clay may fail to cure properly due to incorrect temperature, insufficient baking time, or uneven thickness; If the oven temperature is too low, the clay won’t harden fully. Conversely, overheating can cause burning or warping. Ensure your oven is preheated to the recommended 275°F (135°C) and use an oven thermometer to verify accuracy. Uneven thickness in the clay can lead to undercooked or overcooked areas. Always bake for the recommended time per quarter-inch of thickness. If the clay is too thin, it may crack or break. Proper preparation, such as kneading the clay for consistency, is also crucial. Follow the package instructions closely and avoid distractions while baking to achieve the best results.
Fixing Undercooked or Overcooked Clay
If your Sculpey clay is undercooked, it may remain soft or flexible. To fix this, return it to the oven at the recommended temperature for a few additional minutes, checking frequently to avoid overcooking. For overcooked clay, which may become brittle or discolored, sanding the affected areas can help smooth out imperfections. If the clay is lightly burnt, you can paint over the discoloration after it cools. To prevent these issues, always use an oven thermometer and monitor the baking process closely. For severely overcooked pieces, consider starting over with fresh clay. Proper preparation and adherence to baking guidelines will help ensure your project turns out as intended. Remember, small mistakes can often be corrected with careful touch-ups or additional layers of clay.
Resolving Issues with Clay Adhesion
If your Sculpey clay pieces aren’t adhering properly, ensure surfaces are clean and free of residue. Lightly roughening the areas with fine-grit sandpaper can improve adhesion. Apply a small amount of liquid Sculpey or Bake & Bond to act as a bonding agent before pressing pieces together firmly. Bake the entire piece at the recommended temperature to cure the clay evenly. If adhesion fails after baking, you can reinforce the joint with a strong adhesive, such as epoxy or super glue, once the clay is fully cured. Proper alignment and pressure during assembly are key to achieving a strong bond. Avoid overworking the clay, as it may become too soft and lose its adhesive properties. For intricate designs, baking in stages can help maintain structural integrity and ensure proper adhesion.